Creating a Purchased Non-Inventory Part
Create a new non-serialized part for an item that you buy from a supplier.
-
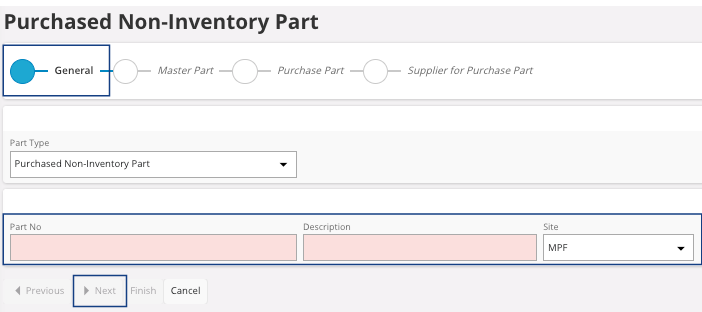
If you chose to create a Purchased Non-Inventory
Part:
- Enter a name for the new part, in the field Part No and a Description.
- Select your Site.
- Click Next.
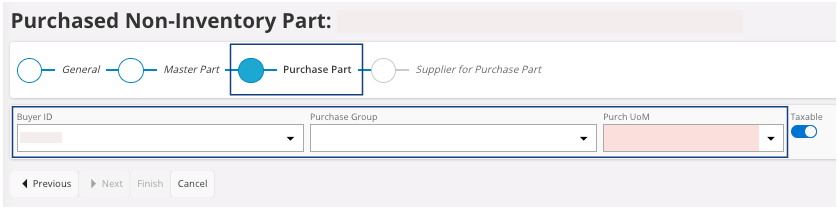
- Do not change any fields in the Master Part section. Click Next.
-
In the Purchase Part
section:
- You can change the person to refer for the purchase in the field Buyer ID.
- Define the Purchase Group.
- Define the unit of measure of your part in the field Purch UoM.
- Click Next.
Your part has been created. -
Define the Supplier settings for your purchase
part:
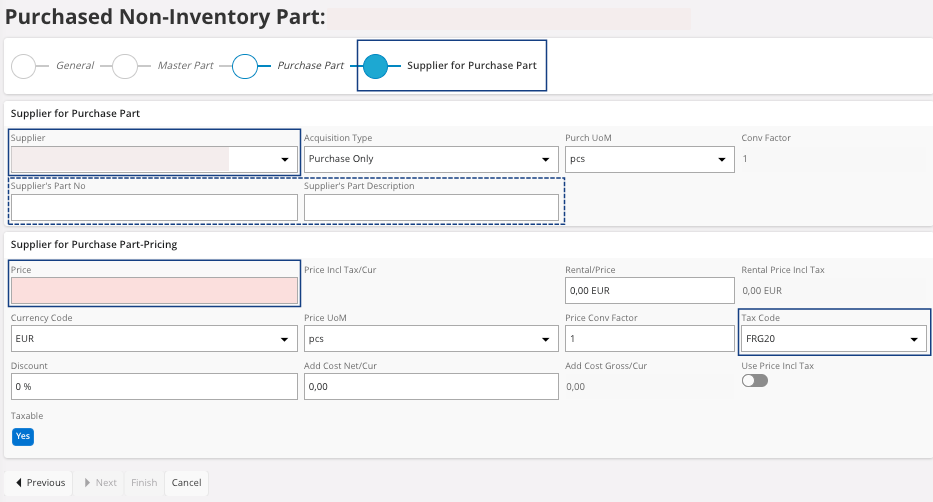
-
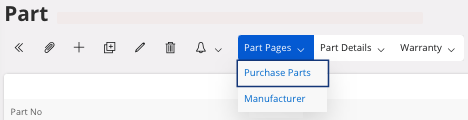
You need to go in the page Parts and filter the page with the
Part No. Once you find
your part, click the three dots
 and
click Details.
and
click Details.
-
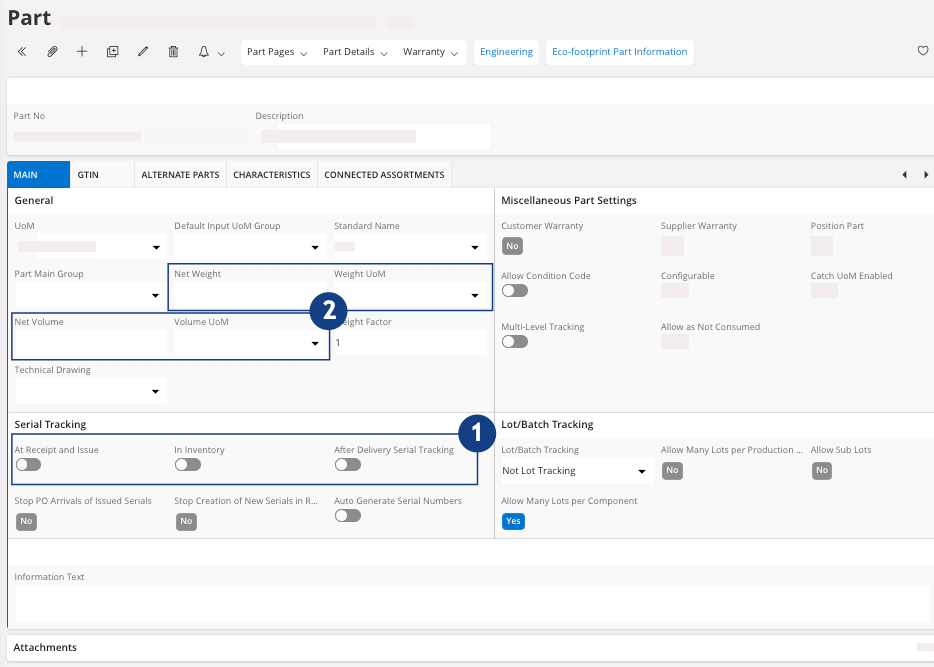
Check your information in the Main tab:
-
In the area Serial
Tracking, check that the
toggles At Receipt and
Issue, In Inventory and
After Delivery Serial
Tracking are
turned off
 .
.
-
You can add a Net Weight
and a Net Volume for your
part
 .
.
-
In the area Serial
Tracking, check that the
toggles At Receipt and
Issue, In Inventory and
After Delivery Serial
Tracking are
turned off
-
In the header, click .
-
In the Purchase Parts page, in your line
click the three dots and click Details.
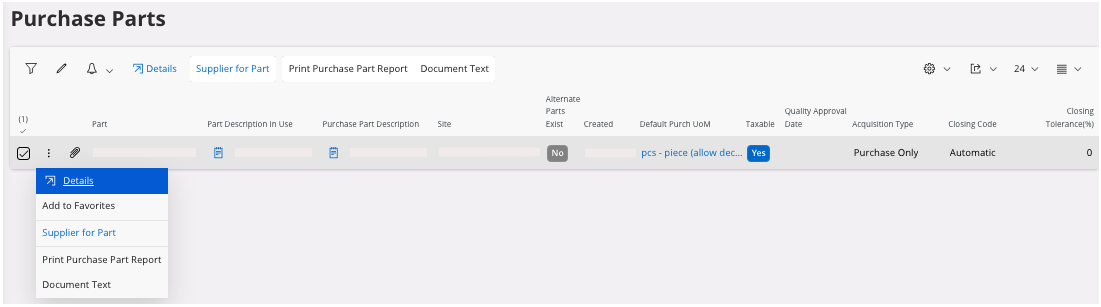
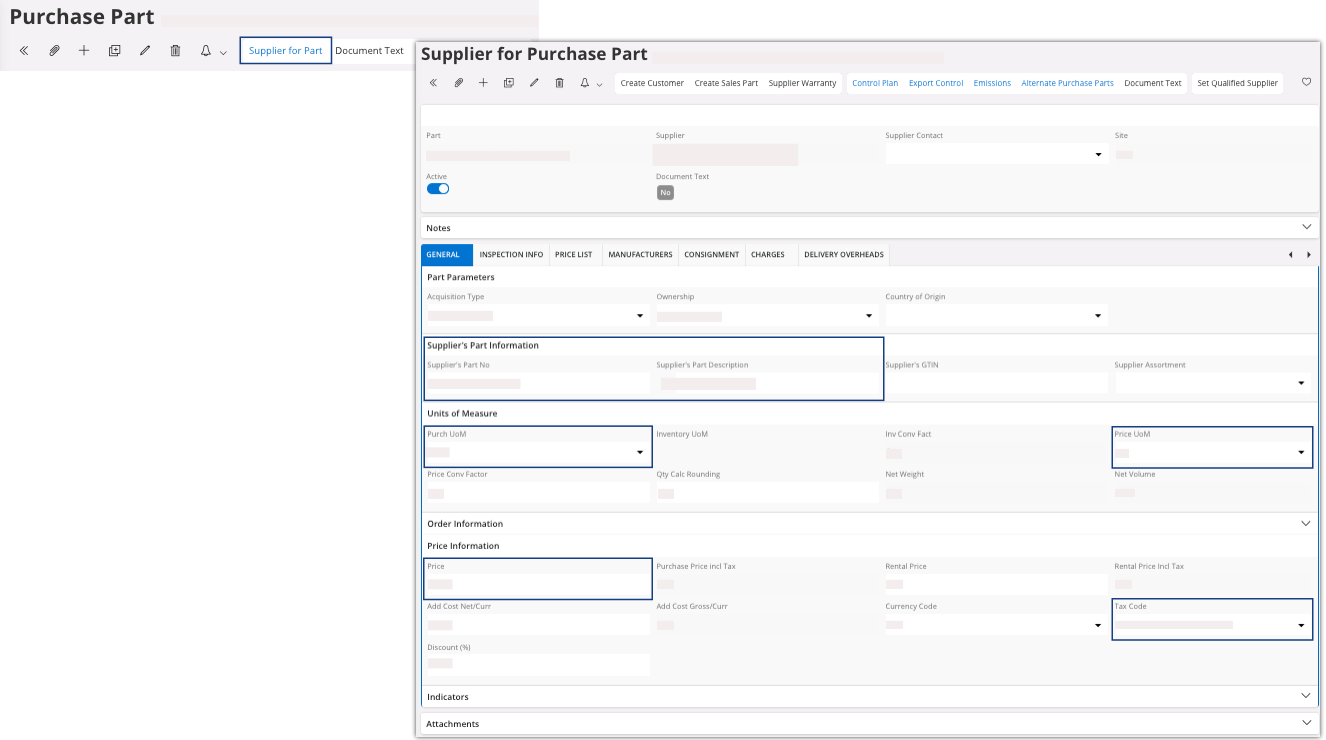
The Purchase Part page opens. -
Check information in the General tab:

-
Then click the Supplier for
Part button at the top
of the page to check the information linked to the supplier.