Creating an Instant Invoice
If you have a specific requirement that you cannot solve with a purchase order based on a customer invoice, then contact your IFS Cloud internal support to configure an instant invoice according to your needs.
An instant invoice uses object in order to create an invoice. You need to
configure it before doing the instant invoice:
- Go to .
The next steps help you to create an instant invoice.
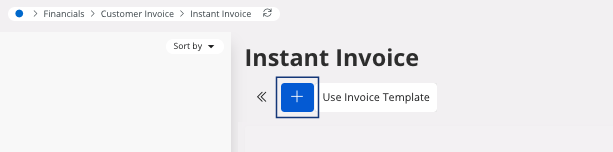
- Go to .
-
Click New +.
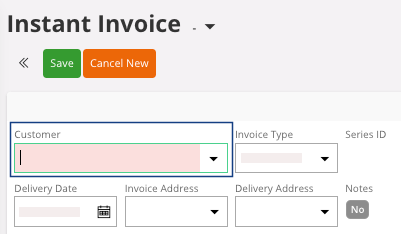
-
Fill the field Customer and
click Save.
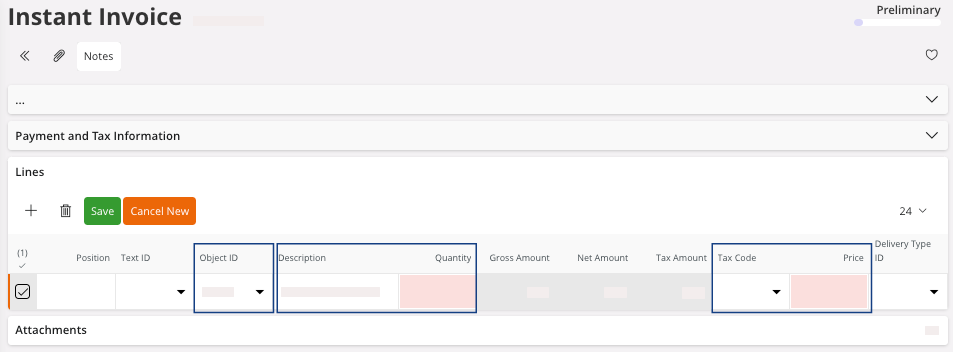
- In the area Lines, click New + to add a line.
-
Fill the fields:
-
If you want to add a Customer
Reference or other information
related to the invoice, click More
Information.

A pane appears. - In this pane, edit the fields that you want.
-
Once you have entered all the information, you can print a work copy, click
Print Work Copy
 .
.
-
Once you checked all the information, you can print the final version, click
Print Invoice
 .
.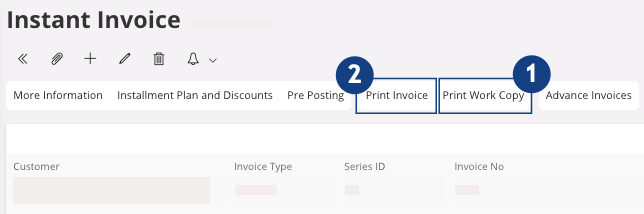
This action posts definitively the invoice and the status becomes Posted Auth.