Adding a New Quantity for an Inventory Part
Change the existing stock: add a new quantity to the stock.
Important:
This process must be exceptional, it is a
specific adjustment in your stock. It must not replace usual processes: reception of
purchase order or any other stock entrance process.
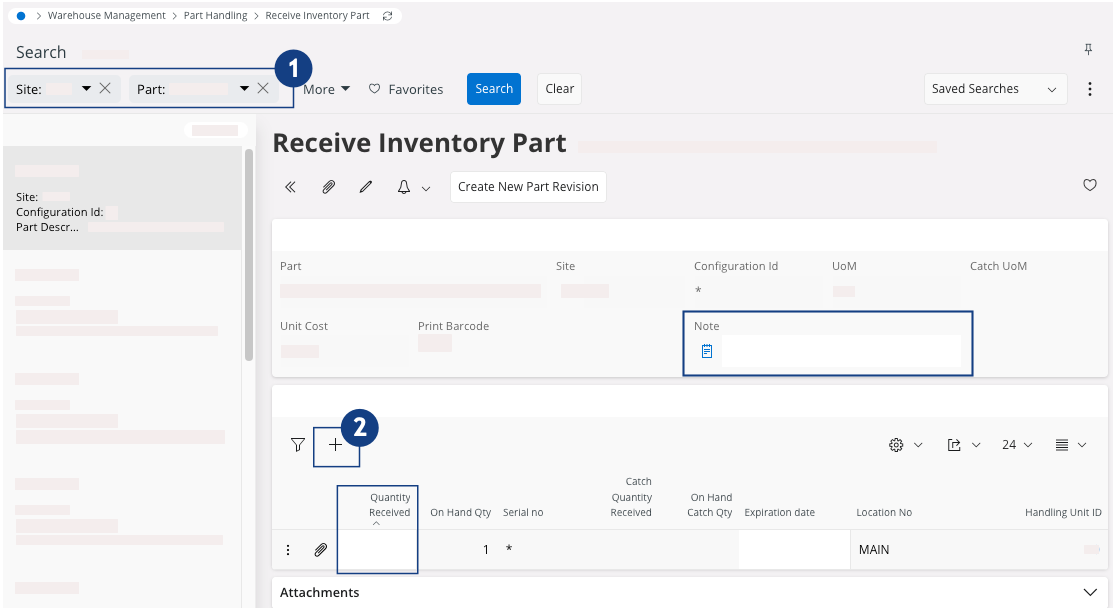
- Go to .
-
In the search toolbar, filter the page on the Site or the Part to get the corresponding
product(s)
 .
.
-
Choose your product:
- Fill in the field Note to justify the stock movement.
-
If there is no line or if your part has a Serial No, click New + to add a new quantity in
the part
 .
.
-
If there is a line and your part is not serialized, fill the Quantity
Received field.
Note:One line correspond to one Serial No only. In case your item is configured as a Serial number Tracking: you need to add a line for each Serial No that you have. -
Complete the fields:
- Quantity Received: enter the full counted quantity if the item is not serialized, if it is serialized, add 1 qty to each line.
- Location No: choose a stock location.
- Serial No if the item is a serialized part.
Note:If you cannot see the field(s): click > Column Chooser > Configure columns
manually and choose the fields that you want to
display.
> Column Chooser > Configure columns
manually and choose the fields that you want to
display.
-
Click Save.
The Pre-Posting dialog appears.
-
In this dialog, you need to link the new part added to a Dept, a Project and a Sub-Dept.
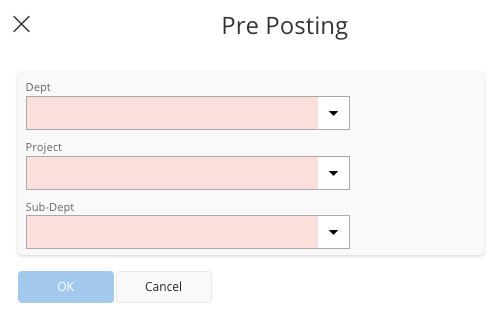
-
Click OK.
If the following pane appears, it means you need to Define Cost Structure or you will not be able to save the entry.
 Considering that IFS Cloud do not have information for this item and you do not have an invoice, you need to estimate an average price of the item at this moment.Important:This action impacts your cost and Profit&Loss.To Define Cost Structure:
- Click New +.
- Add the Cost Bucket ID number: in this case it is always 110 which corresponds to the Estimated Material Cost.
- Add a value for the Cost per Unit.
- Click Done to validate the line and click OK to validate the cost structure.