Counting Reports
Create a report to count the number of specific items or all items in a location, warehouse or company.
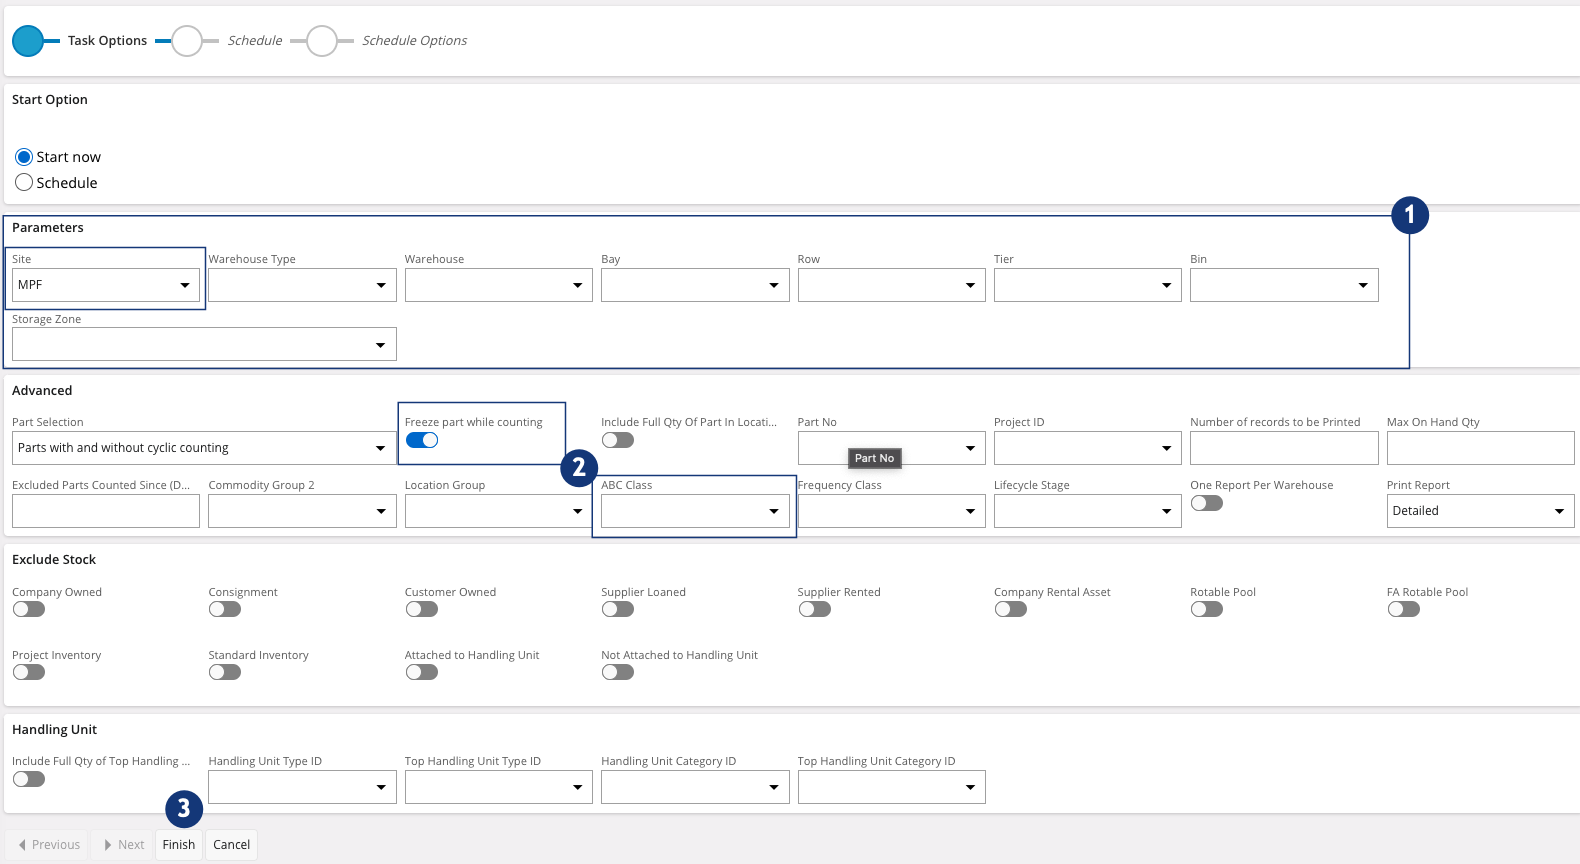
Creating a Count Report
- Go to .
- Select the Site.
-
You can complete all the Parameters fields to define the
scope and be precise
 .
.
-
You can also select, in the box Advanced
 :
:
-
Click Finish
 .
.
You can now find the count report on the page: .
Counting per Count Reports
-
To perform this action, you have two options:
-
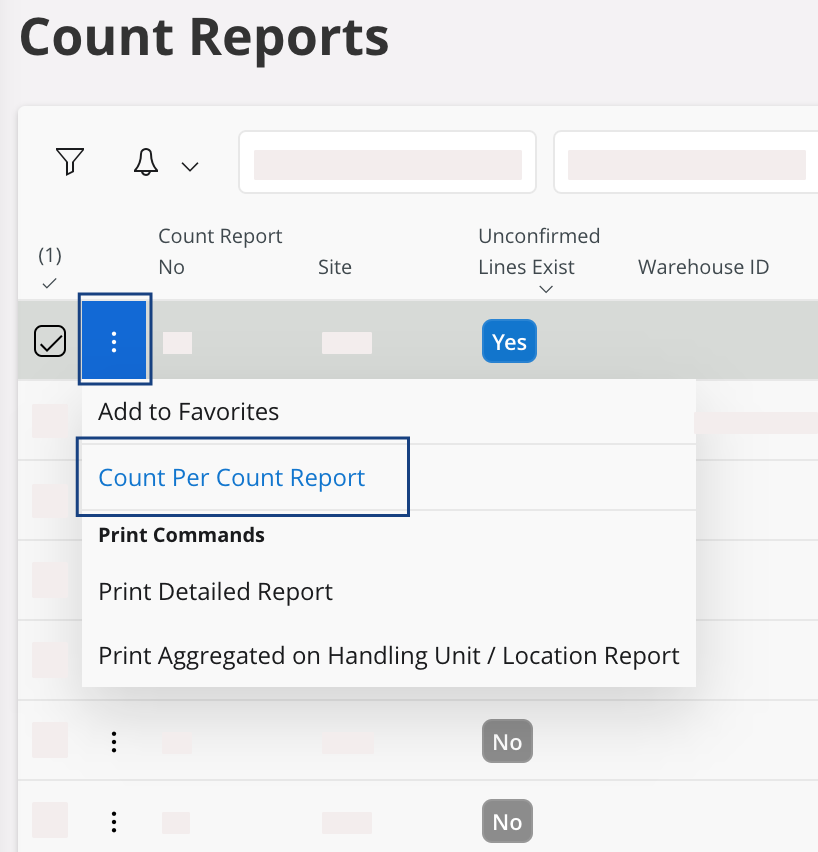
If you are on the page Count Reports, click the
three dots
 on the line you want to
focus on and click Count per Count
Report.
on the line you want to
focus on and click Count per Count
Report.
-
If you are on the page Count Reports, click the
three dots
-
Click
 > Column Chooser > Configure columns
manually, to display at least the columns: Part, Counted Qty, On Hand Qty, Serial No, Location No, Warehouse and Bay.
Note:If you want to count on a paper sheet while going on the shelf, you can export the column list in an Excel file and print it: click
> Column Chooser > Configure columns
manually, to display at least the columns: Part, Counted Qty, On Hand Qty, Serial No, Location No, Warehouse and Bay.
Note:If you want to count on a paper sheet while going on the shelf, you can export the column list in an Excel file and print it: click > Export All Rows > Visible Columns
Only.
> Export All Rows > Visible Columns
Only. -
Click the pencil
 to edit and adapt the quantity for each line in the column Counted Qty.
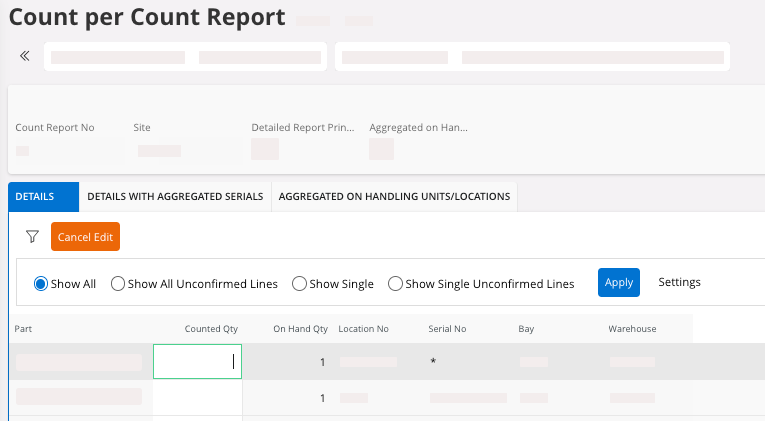
Note:Remember each part serialized have as many lines as Serial No. - Once you have filled the Counted Qty for all items, click Save.
-
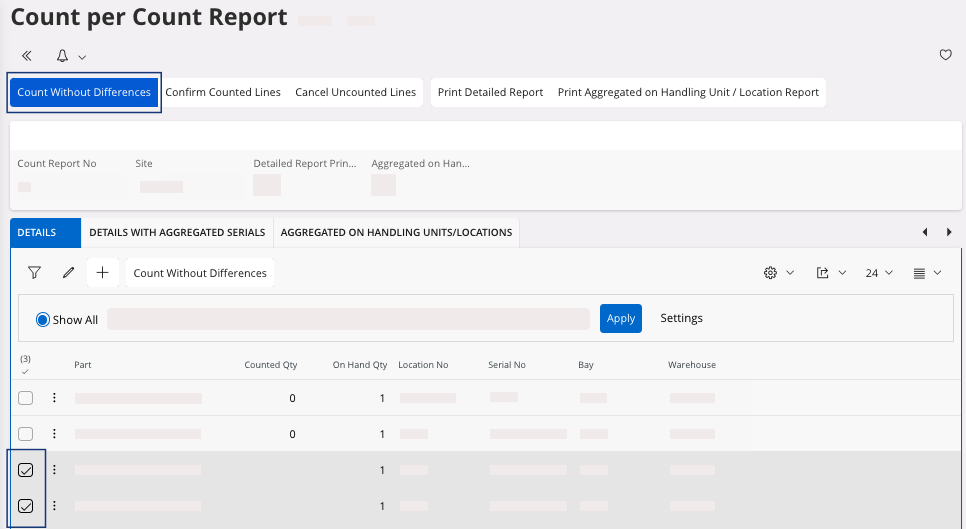
If you have line(s) without any counted quantity you can either:
-
Count them without difference: it means that there is no difference
between the Counted Qty value which is the physical counting and the On Hand Qty value which is
the counting in IFS.
You can select your line(s) and in the header click Count without Differences.
-
Count them without difference: it means that there is no difference
between the Counted Qty value which is the physical counting and the On Hand Qty value which is
the counting in IFS.
-
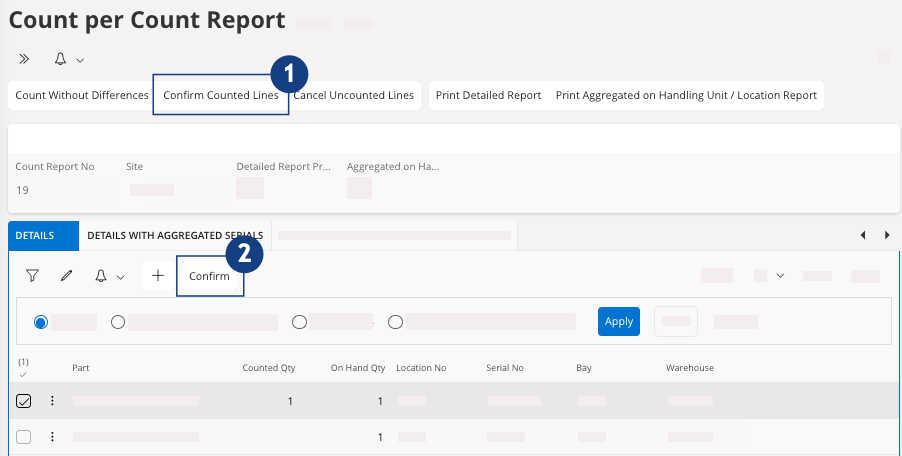
To confirm the report:
-
Click Confirm Counted
Lines in the
header , it confirms all the lines
counted.
-
Or select manually the lines and click Confirm
, it confirms only the lines
selected. The lines that you do not confirm are Unconfirmed lines
and you will need to confirm it later to close your report.
Once your report is confirmed, you can find it in -
Click Confirm Counted
Lines in the
header
Resolving Unconfirmed Lines Issues
The unconfirmed lines are lines in the system that have not been
counted yet. It can happen when you did not finish the counting and you did not
confirm lines. You have to count these lines or cancel them.
-
On the page Count Reports
you need to display the column Unconfirmed Lines
Exist: click > Column Chooser > Configure columns
manually > Unconfirmed Lines
Exist.
-
Click the three dots and click Count per Count
Report.
The page Count per Count Report opens. -
You can enter a Counted Qty
to your lines.
Tip:Click > Column Chooser > Configure columns
manually, to display the column Confirmed, it shows you the
lines that are confirmed or not.
-
Once you filled the Counted Qty, you can Confirm Counted
Lines or Cancel Uncounted
Lines in order to
confirm your count report.
Once your report is confirmed, you can find it in
Canceling the Count Report
You can cancel a report if it has not been confirmed yet.
- Go to .
- Select your Count Report No.
- Click OK.