Creating a Bank Reconciliation Statement
To create a bank reconciliation statement, you need to upload your bank statement, then match the transactions between your bank and the ones recorded in IFS Cloud.
Uploading the Bank Statement
- Before connecting to IFS Cloud, download your bank statement in CSV format from your bank.
- In IFS Cloud, go to the page External File Assistant.
-
In Set External File
Type
page:
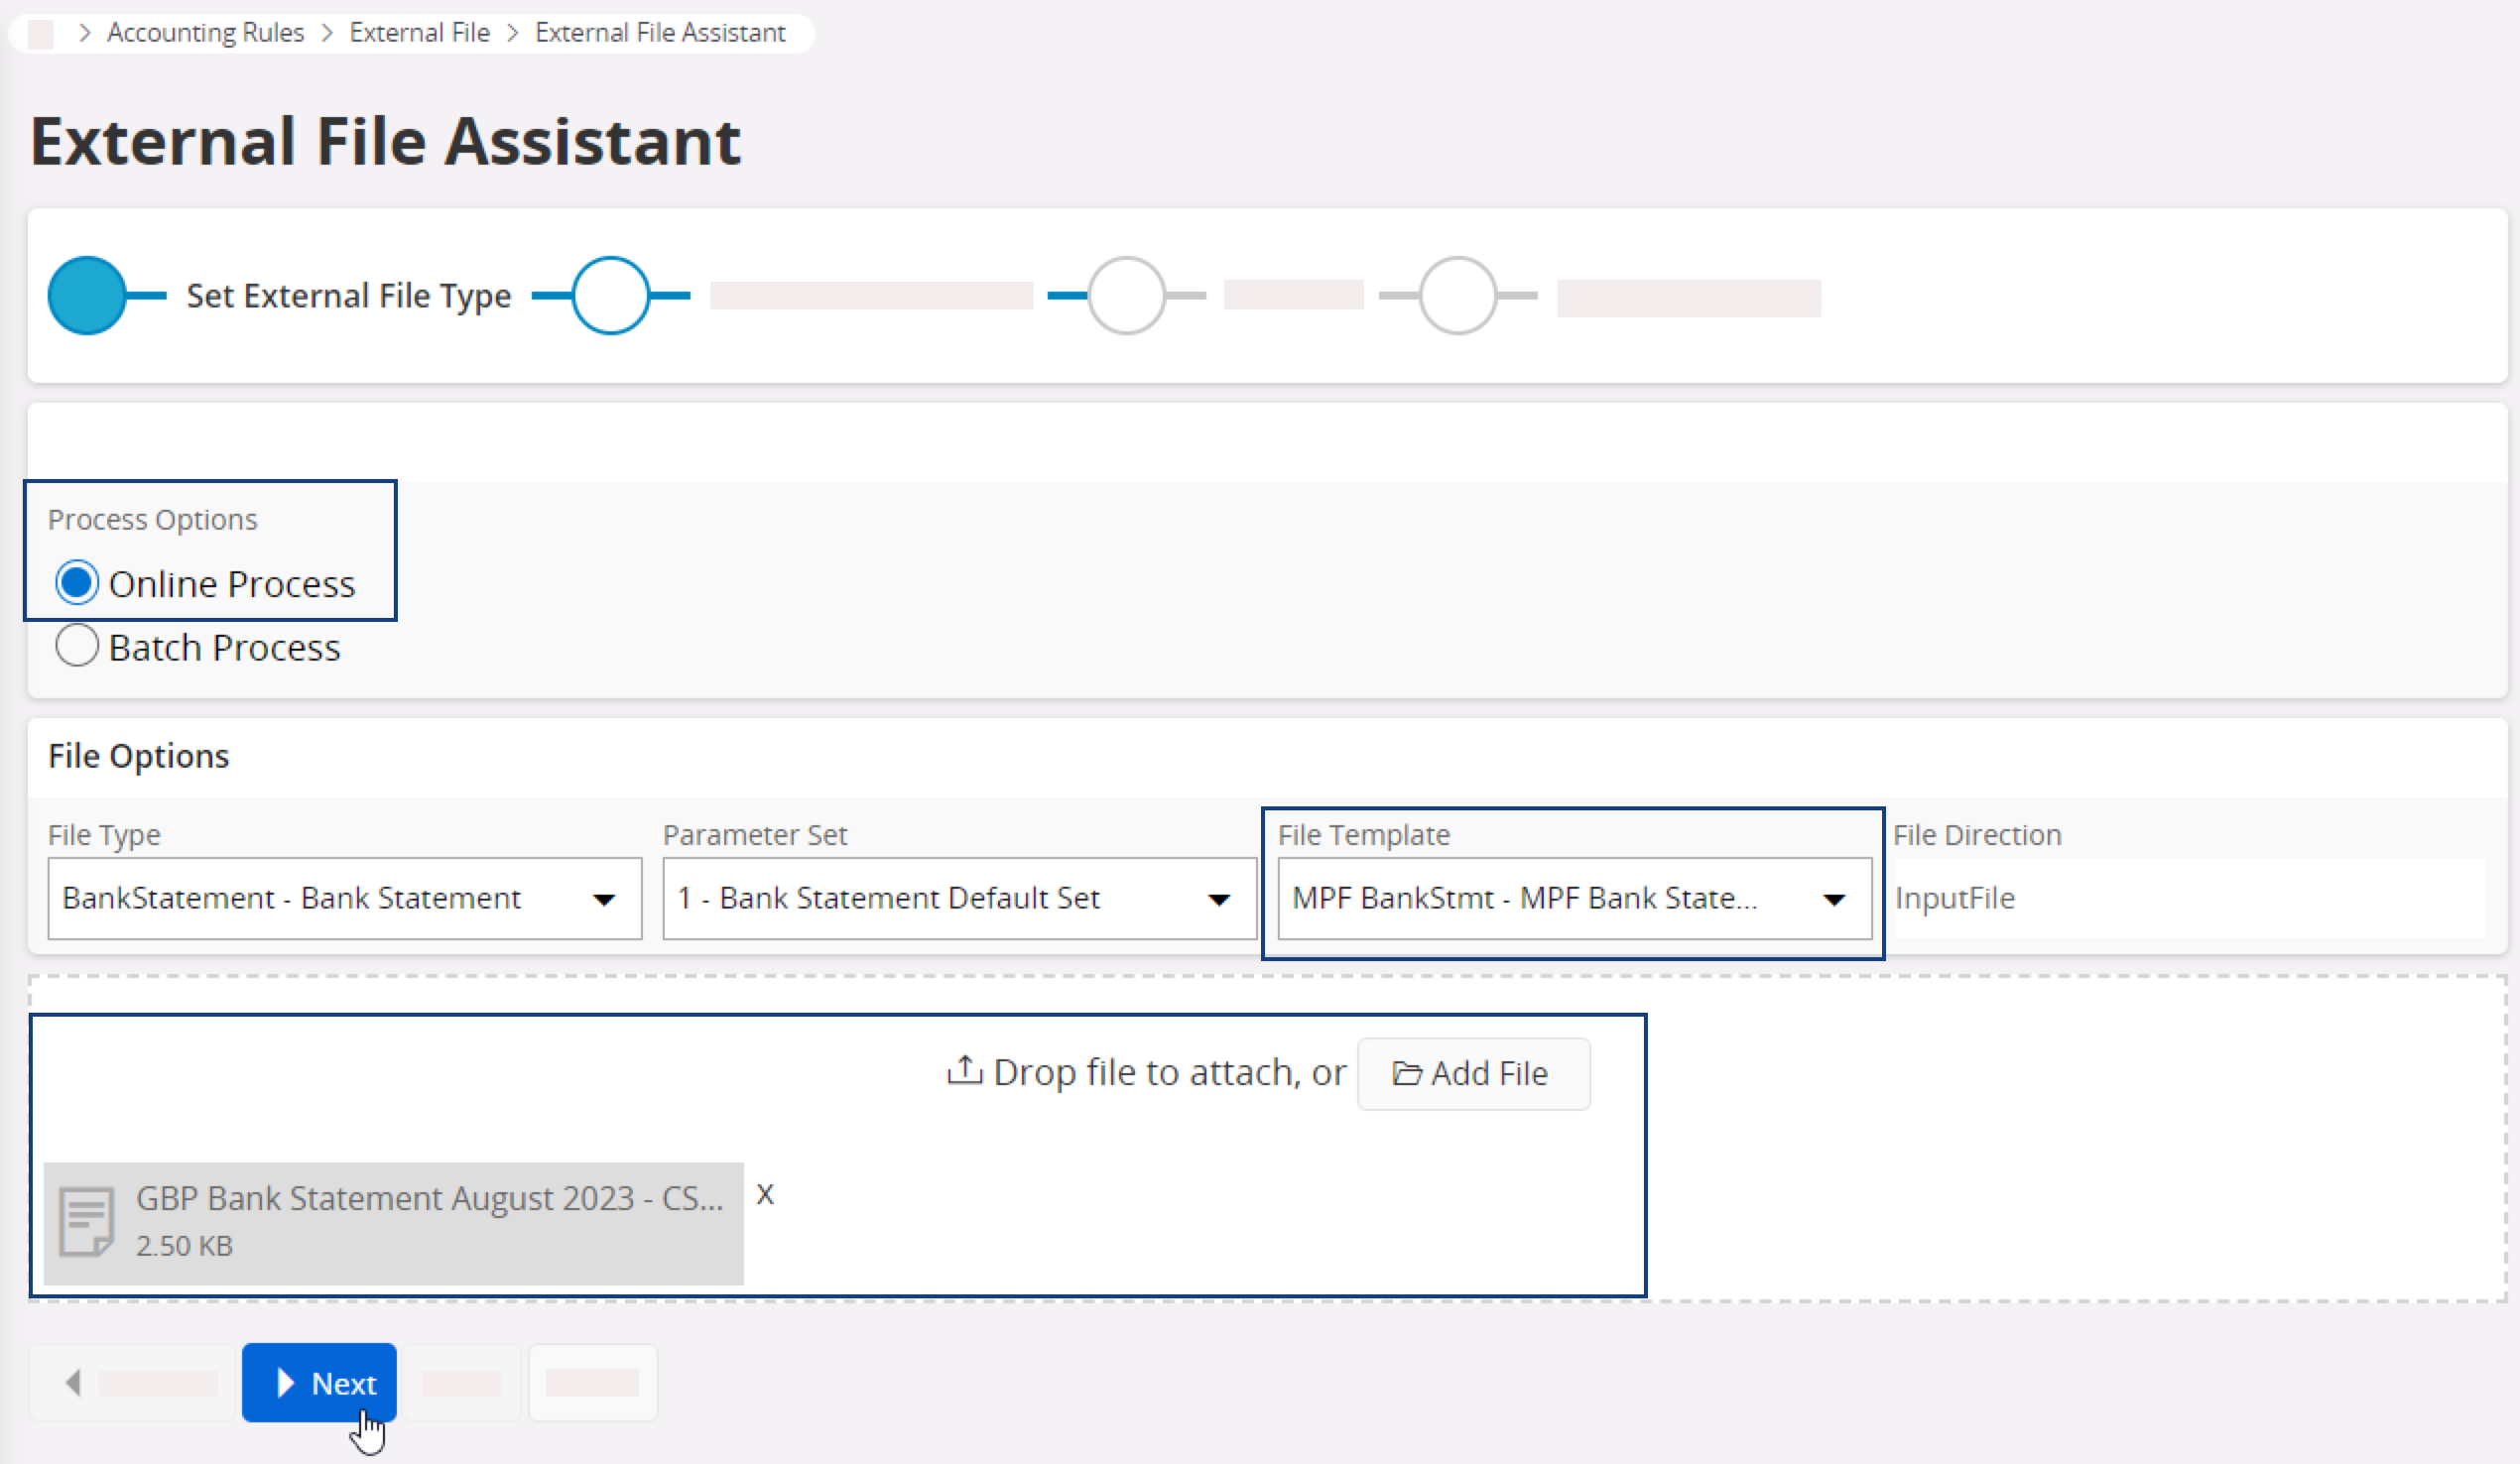
- Click Next.
-
In Set Parameter
Values
page:
- Select the correct Cash Account.
- Complete the other details.
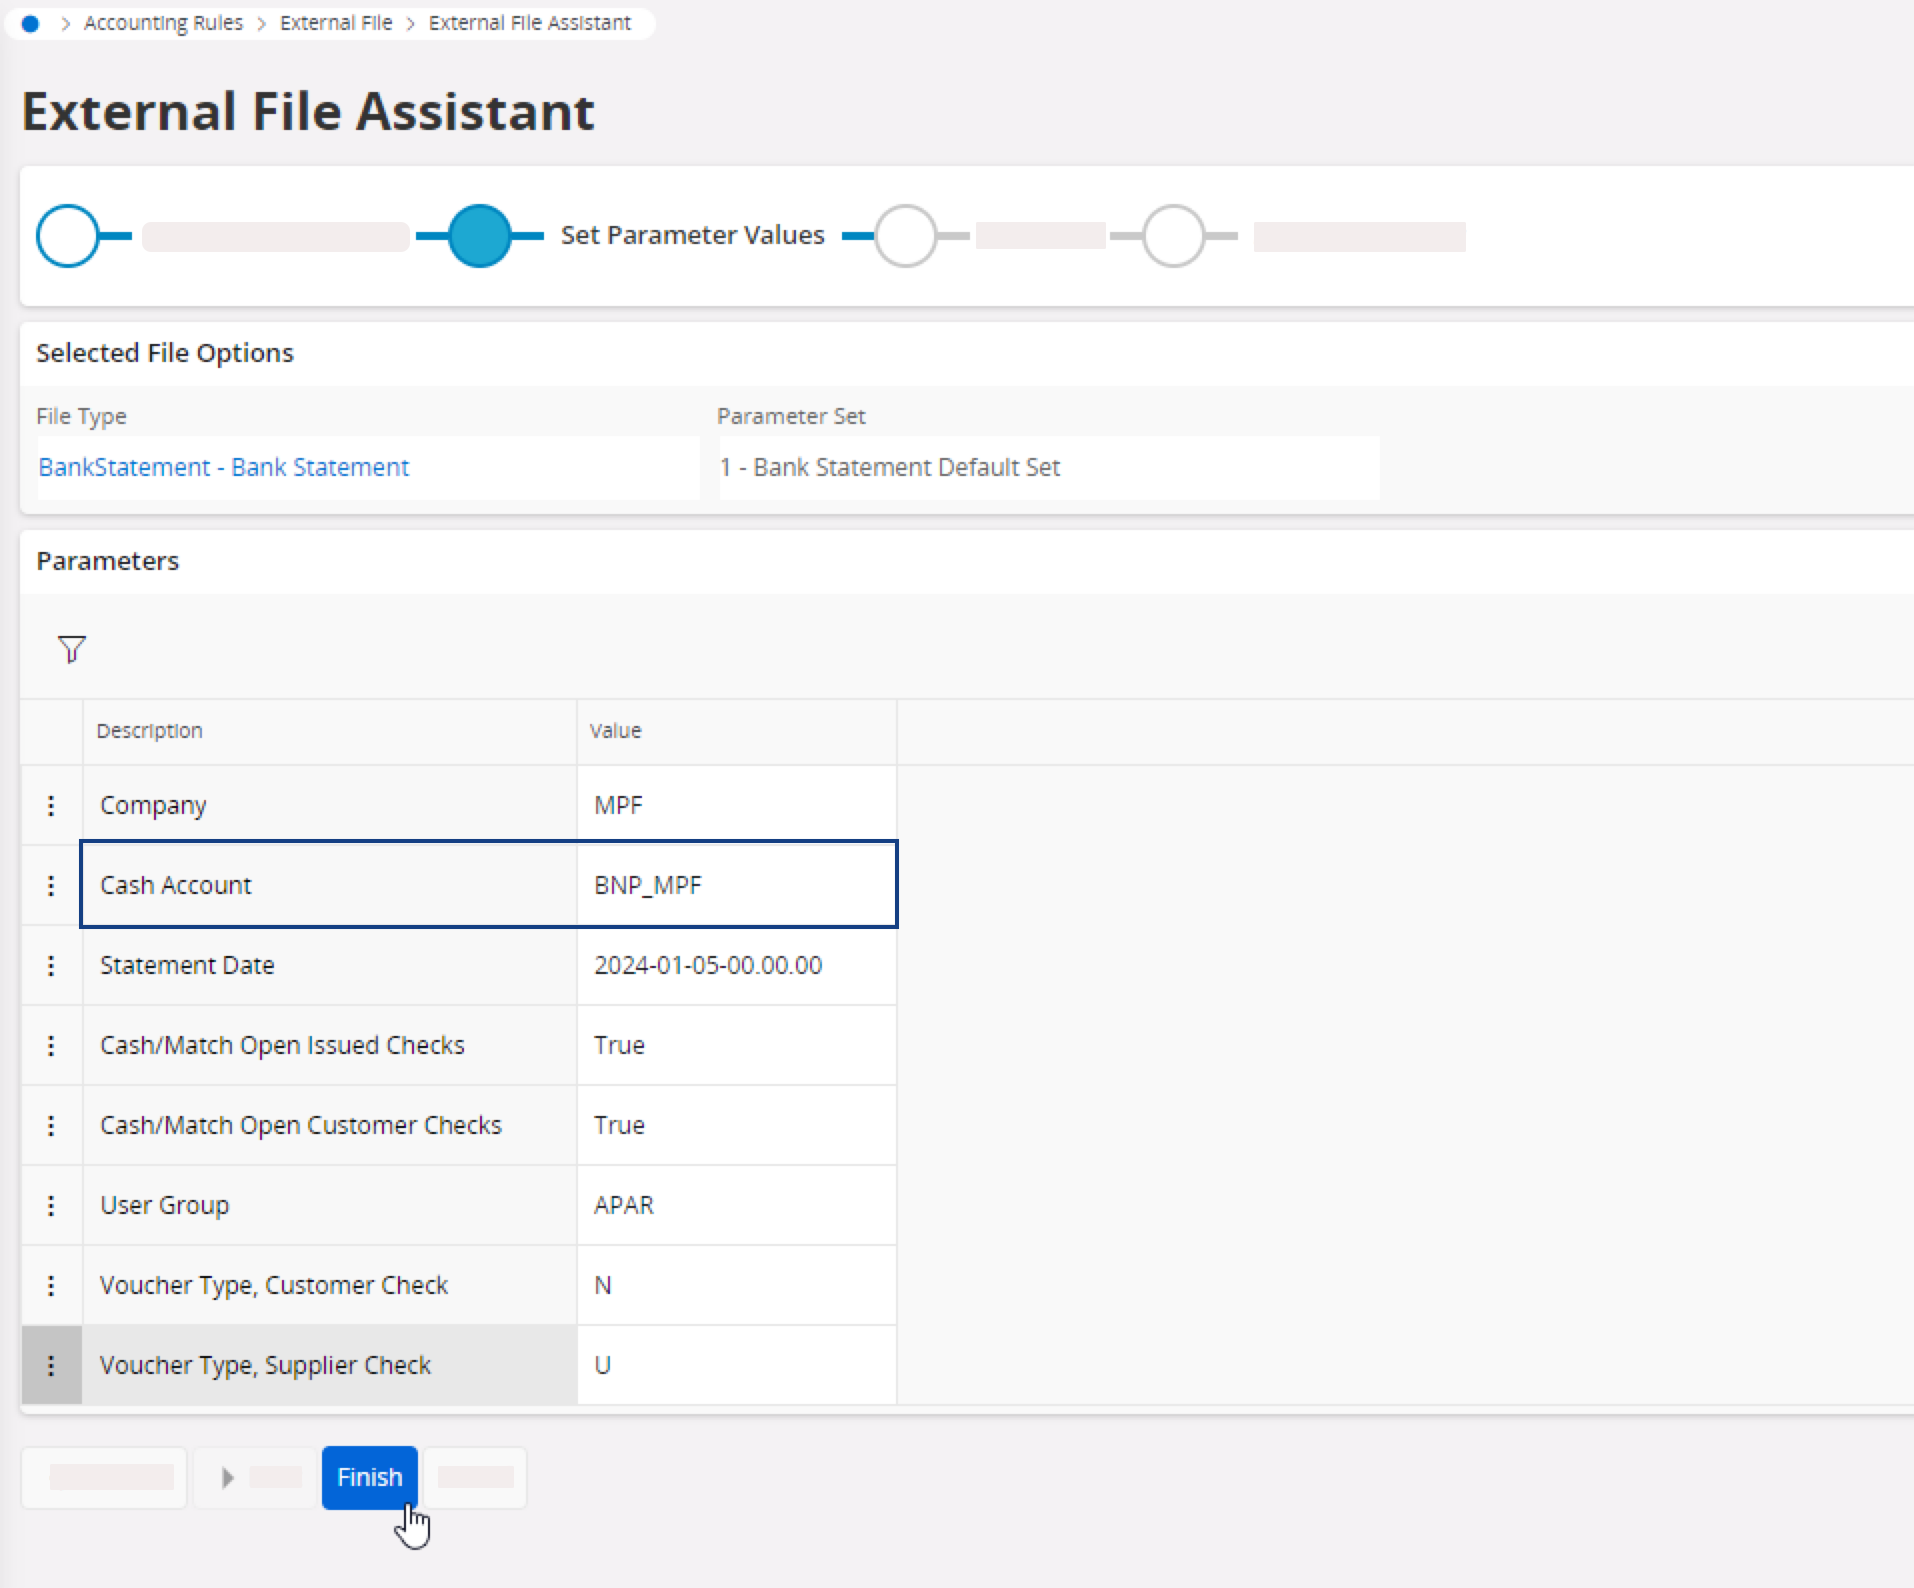
- Click Finish.
Matching the Transactions
- Go to the page Automatic Transaction Matching.
- Make sure to select your company, then select the Cash Account.
-
The Reconciliation
Date populates
automatically with the date of the latest CSV bank file uploaded. It should
match the date from the header of the uploaded CSV file. If not, change
it.
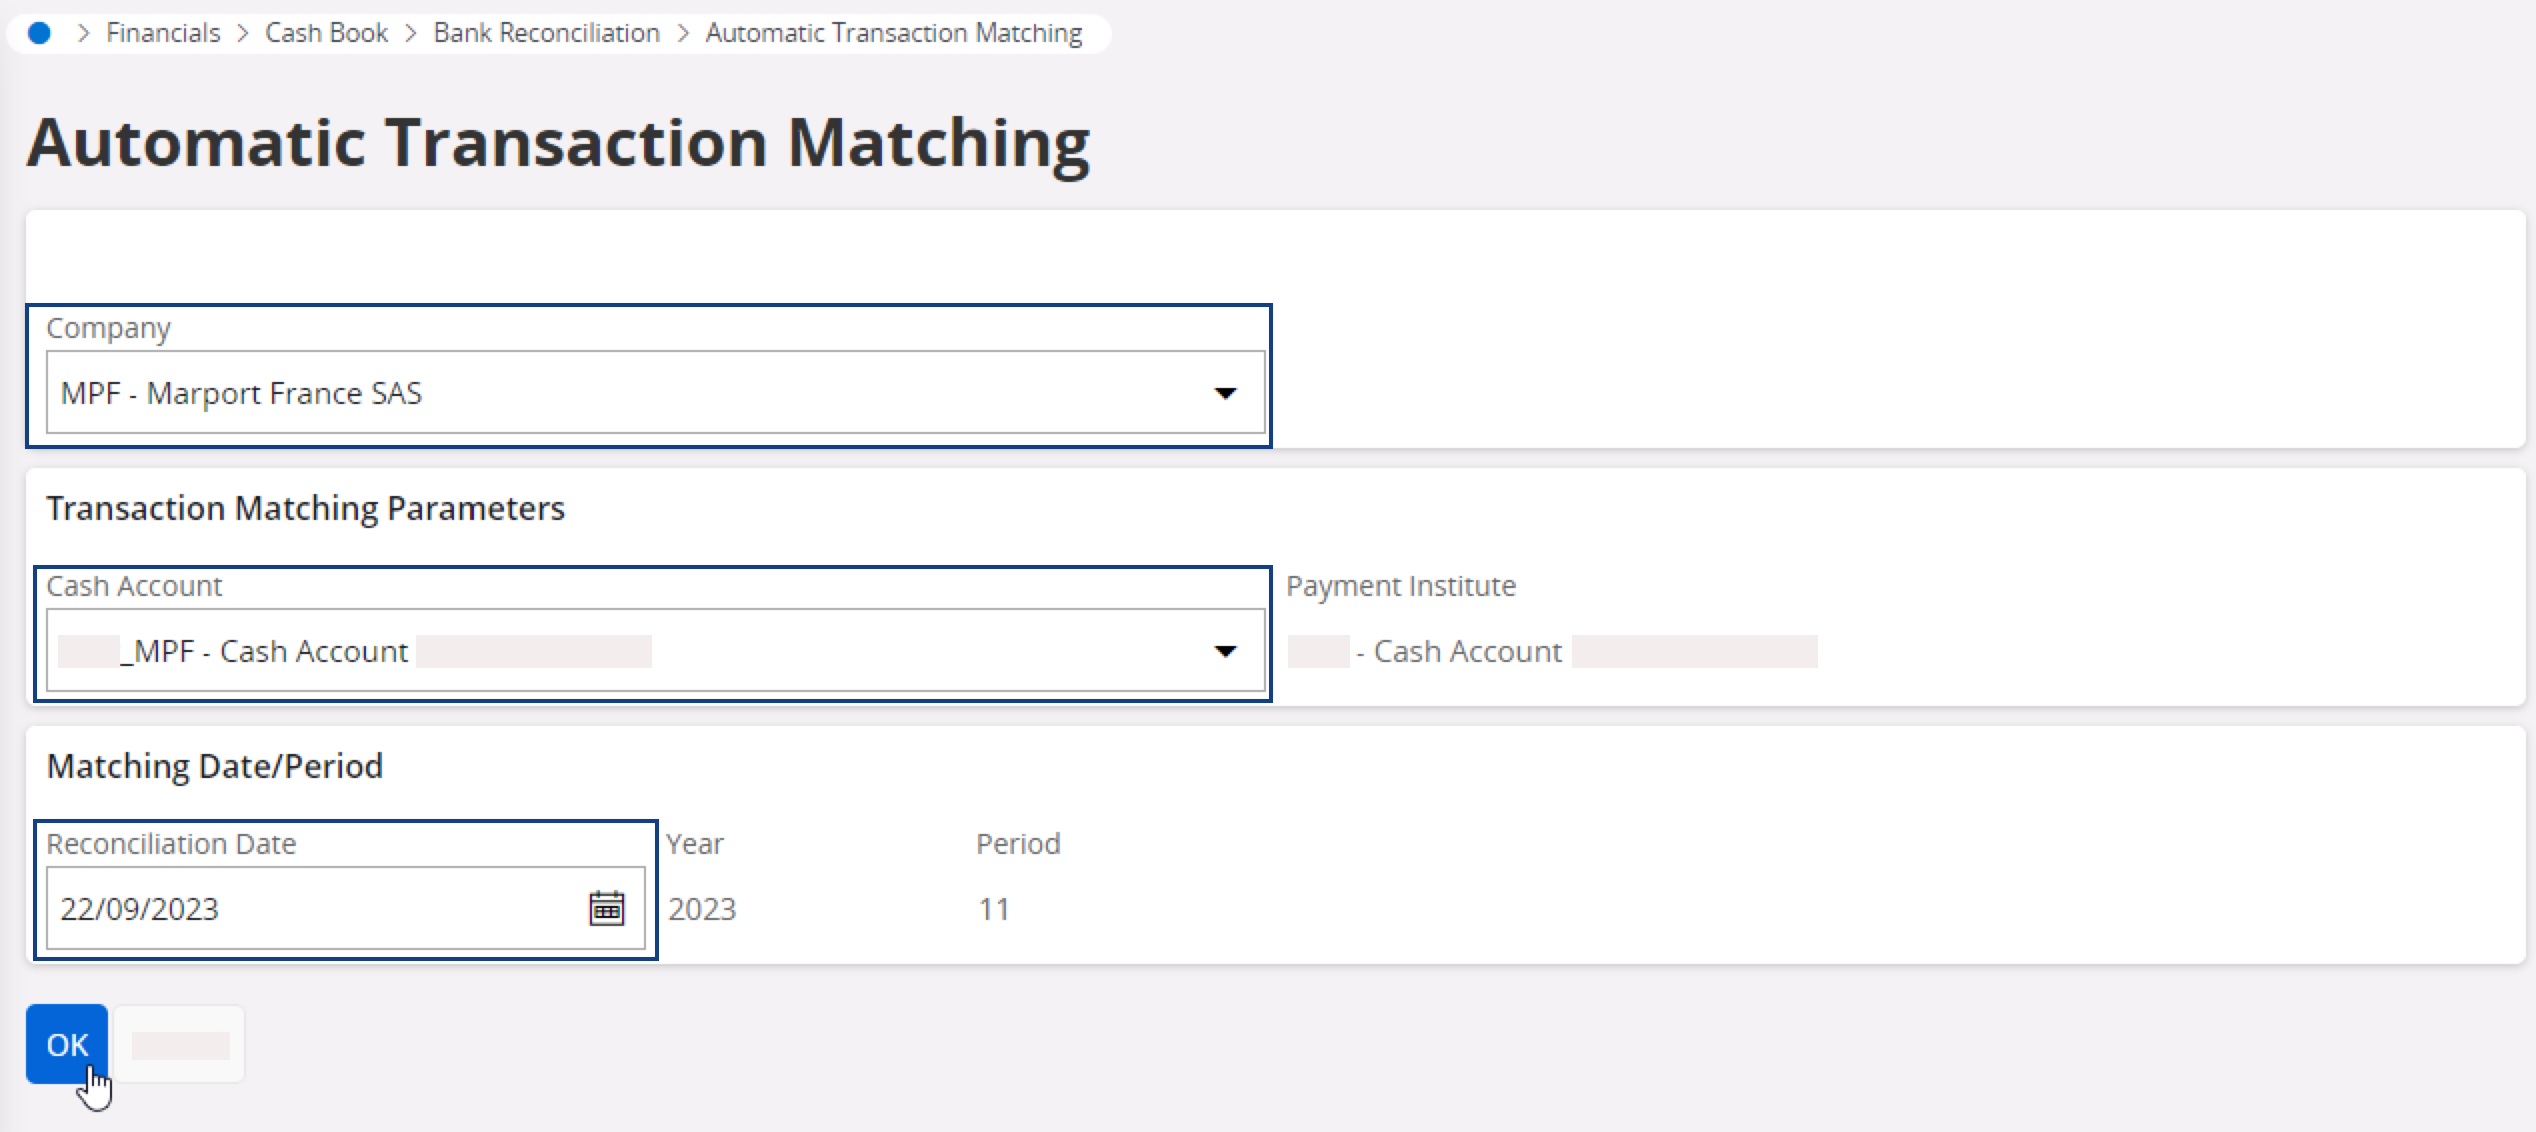
-
Click OK.
The transaction matching page is displayed.
-
Select the lines that match between Cash Transactions and Bank
Transactions, then click Manual Matching each time you match a
set of lines. Once matched, the lines disappear from the list.
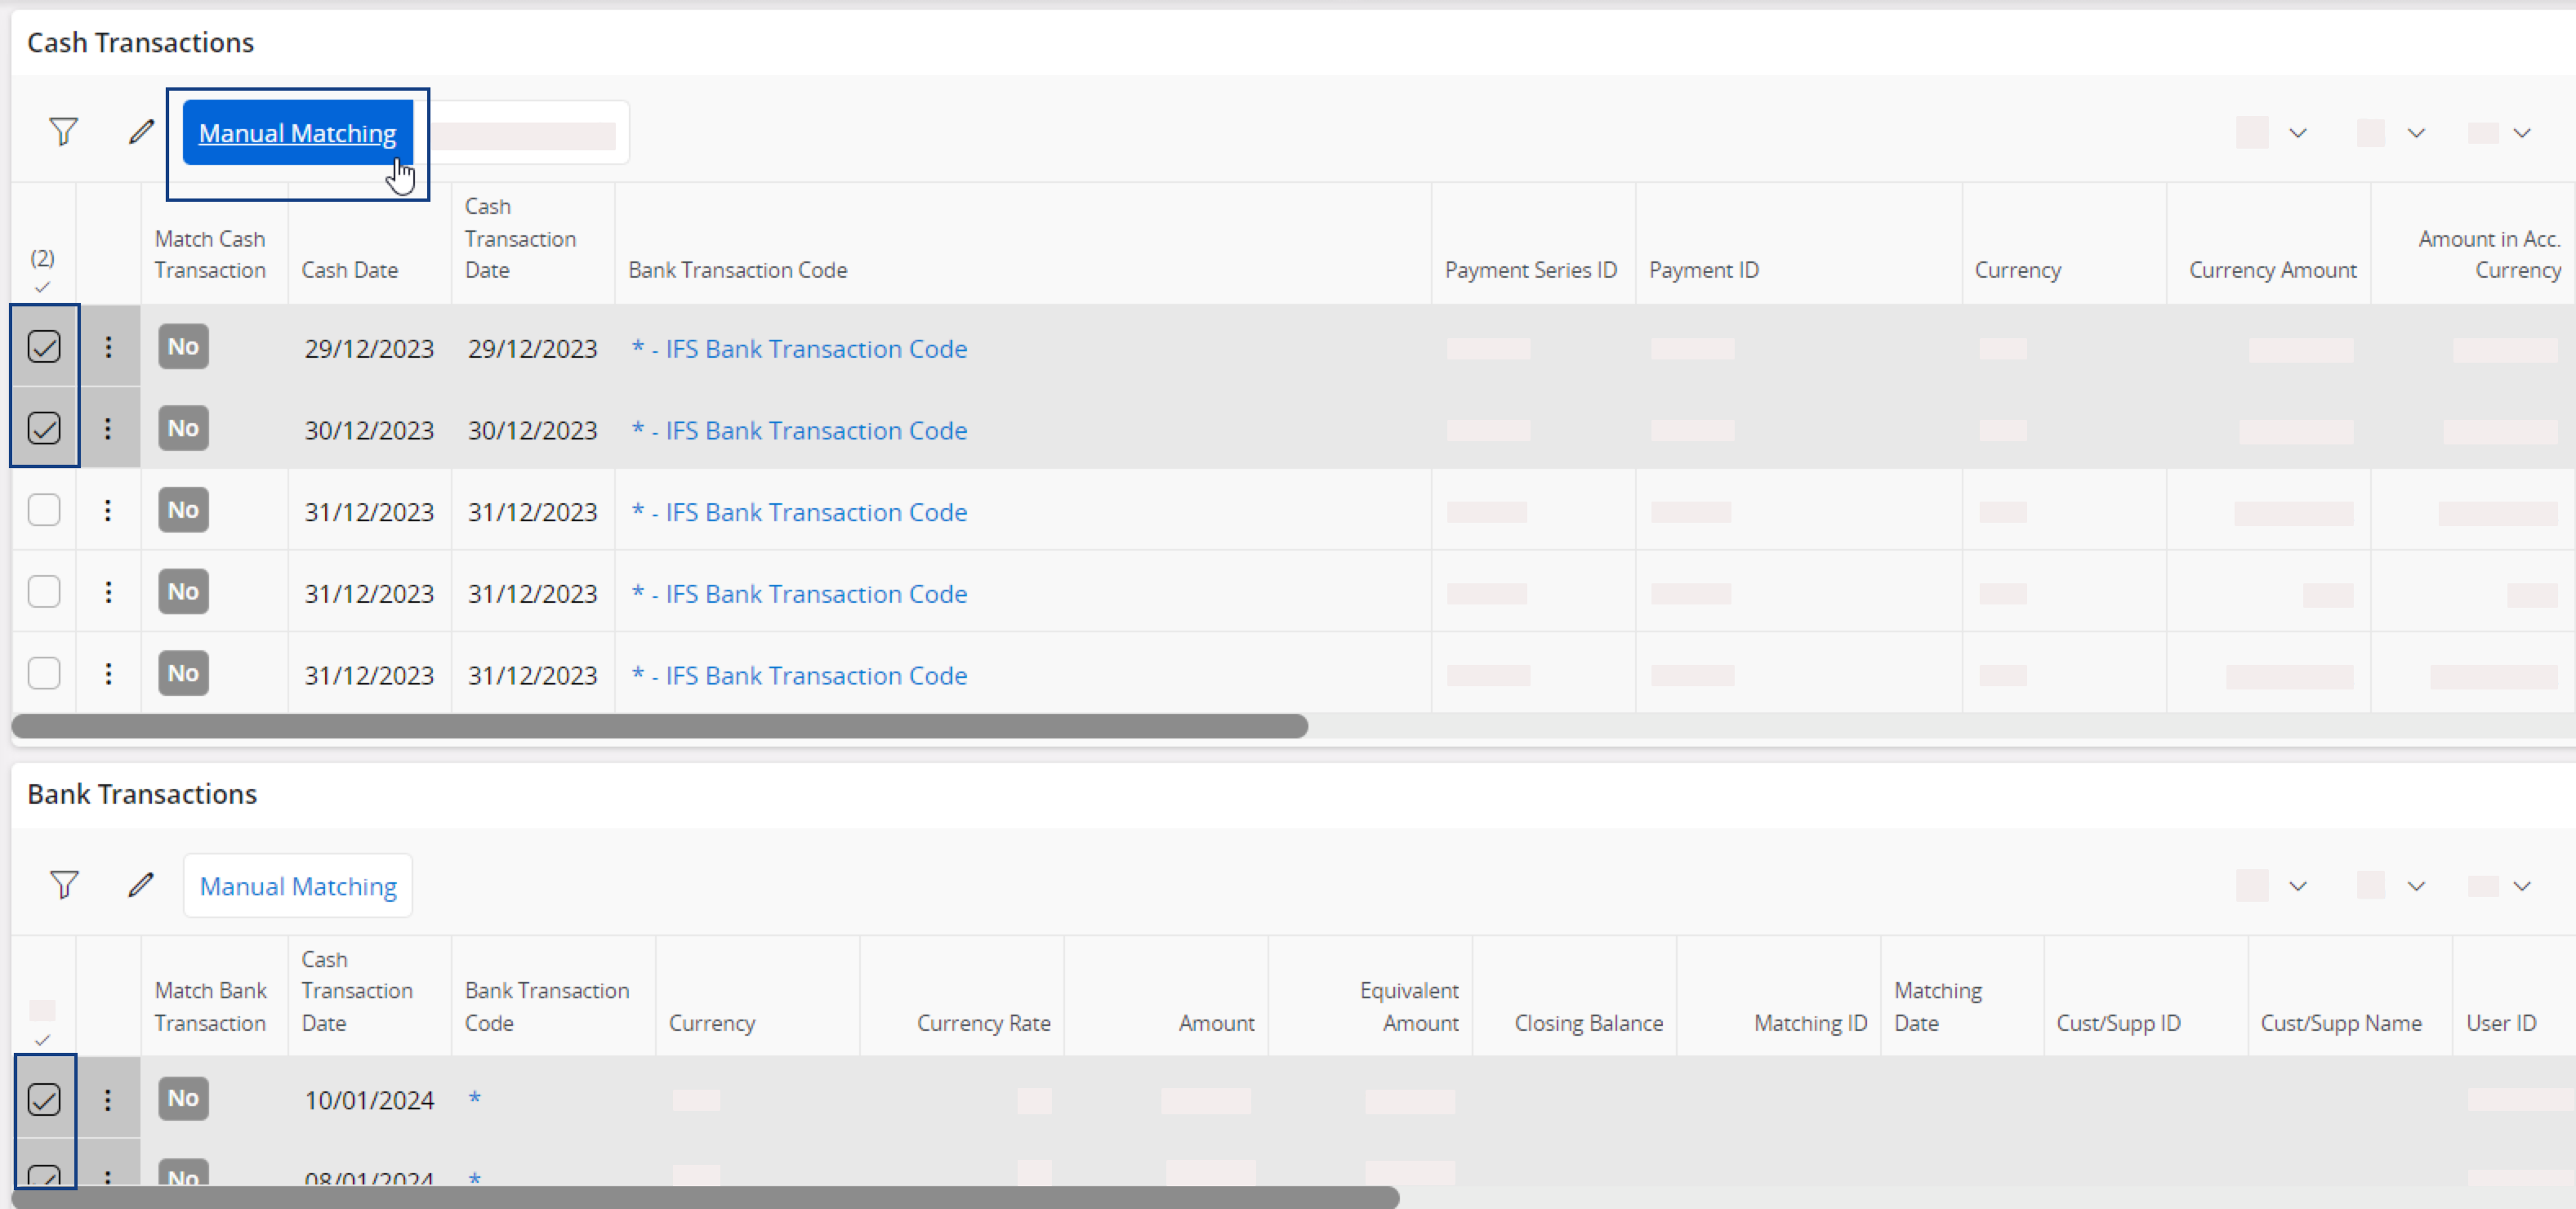
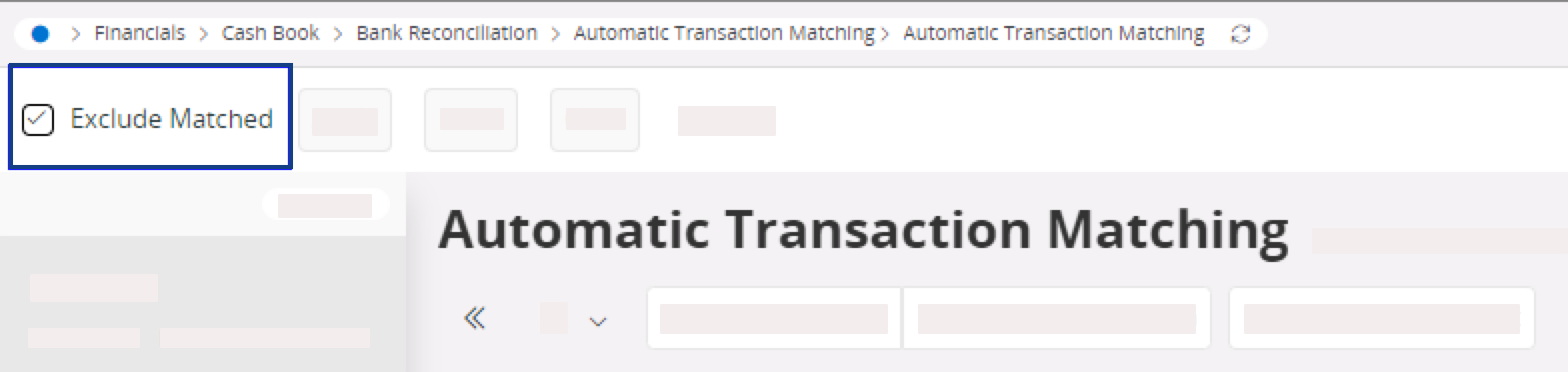
Note:Transactions by checks do not appear in this list. They are automatically matched. -
If you also want to show in the list the transactions that you have
matched, deselect Exclude
Matched at the top of the
page.