Creating an External Purchase Order
- Go to .
- Click New + to create a new purchase order.
-
Select your Site and your
Supplier.
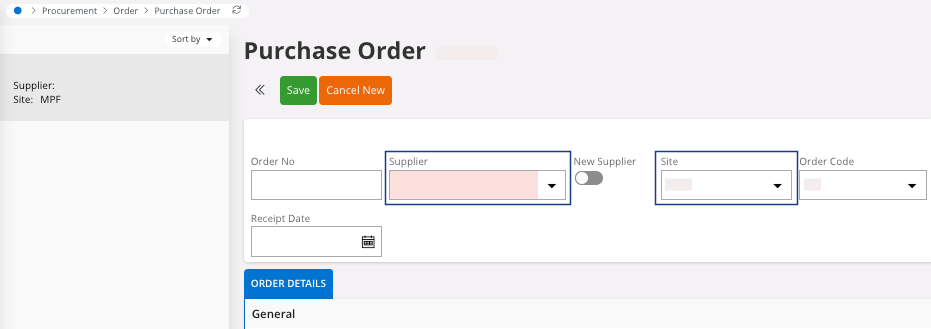
Fields fill automatically with the default values from the supplier.Note:If you want to change information about the supplier, make the changes directly from this page. - Click Save.
-
You can specify to which department, project, or sub-department this purchase
order will be allocated:
-
In the header, click Pre-Posting.

The Pre-Posting pane appears. -
You can associate the purchase order to a Dept, a Project or a Sub-Dept. You can fill the three
fields or choose one of them.
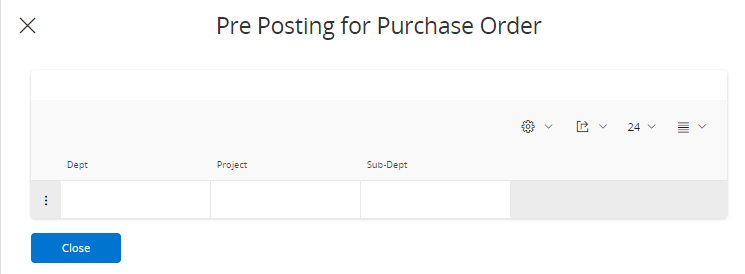
Note:If you specify information in the pre-posting header, the same information is applied to each line. However, you can directly modify it in the lines. -
In the header, click Pre-Posting.
- Add lines with parts that exist in IFS Cloud, see below Adding Lines with Parts from IFS Cloud.
- Add lines with no parts from IFS Cloud, see below Adding Lines with No Part Lines.
Adding Lines with Parts from IFS Cloud
-
Go to the tab Part Lines
 :
:
-
Click New + to add
line(s)
 .
.
-
Select the Part No
of the product(s) that you want to buy
 .
.
Note:You can select only parts available from the supplier selected and already in the system. To add parts that do not use existing parts in IFS Cloud, see below in these instructions. -
Click New + to add
line(s)
-
Add the Quantity of each
product
 .
.
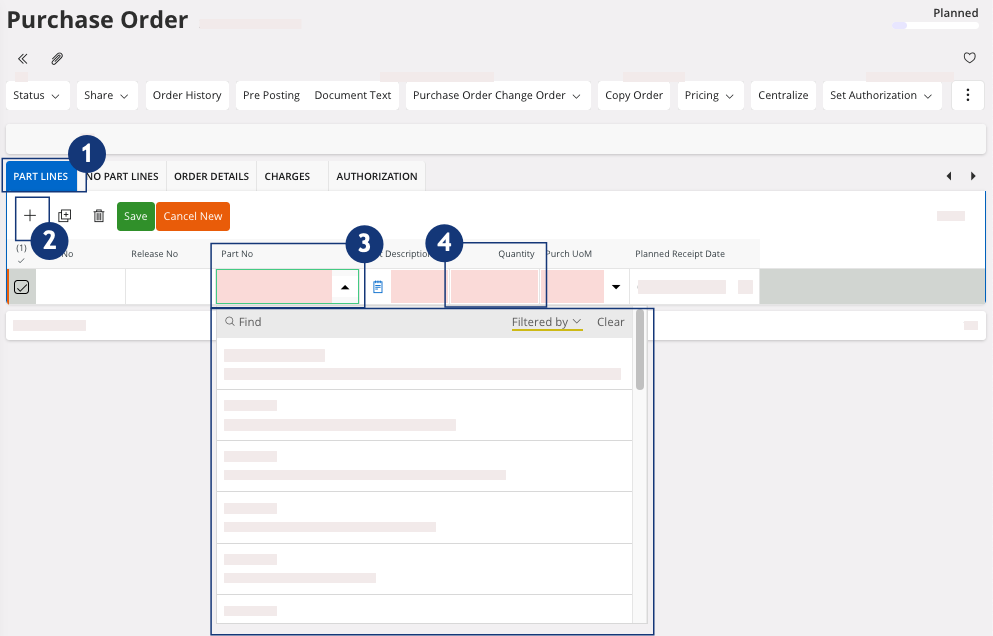
Note:The creation of parts is important because each line is automatically filled with the default information from these parts.For example, here, the fields Tax, Price and Price UoM are automatically filled.
- Click Save.
Adding Lines with No Part Lines
- Go to the No Part Lines tab.
-
Click New + to add line(s)
and fill the fields:
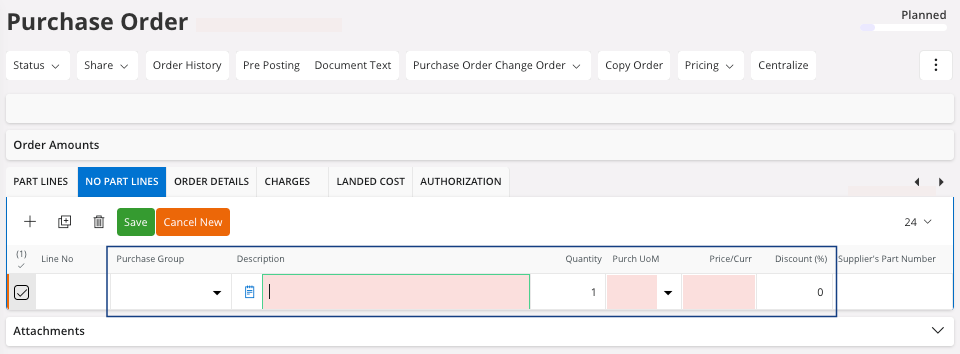
- Click Save.
-
You need to define to which department, project, and sub-department these
no parts lines will be allocated:
Important:The Pre-Posting is mandatory in these lines.
-
Select one or several lines and click Pre-Posting.

The Pre-Posting pane appears.
Note:If you specify information in the pre-posting header, the same information is applied to each line. However, you can directly modify it in the lines. -
Select one or several lines and click Pre-Posting.